I wasn't originally too keen on making a gingerbread house with the girls. There was just so much going on in the house I thought it would be a bit of a disaster - finding a pattern, making the pieces, assembling the house etc. all while caring for sweet baby Emily. Enter the gingerbread kit! My Mom bought us a Wilton gingerbread house kit and nonchalantly gave it to the girls a few weeks before Christmas. That pretty much sealed the deal - we were making a gingerbread house!
I did a few Internet searches and saw some different ideas and a few tips on making gingerbread houses with children. 3 tips stood out: use a kit and save yourself any baking drama plus younger kids enjoy the candy part the most, not the baking and assembly and waiting part, buy candy that is NOT your children's favourites (so they eat less during the process) and put the candy in a muffin tin so it's easy to choose and also keep the work area tidier without a bunch of opened candy bags strewn about. Win, Win, Win. The kit came with some candy but I bought a few extras just in case - I fully expected some to be eaten as we worked and we all did ;)
Here's our candy all set up:
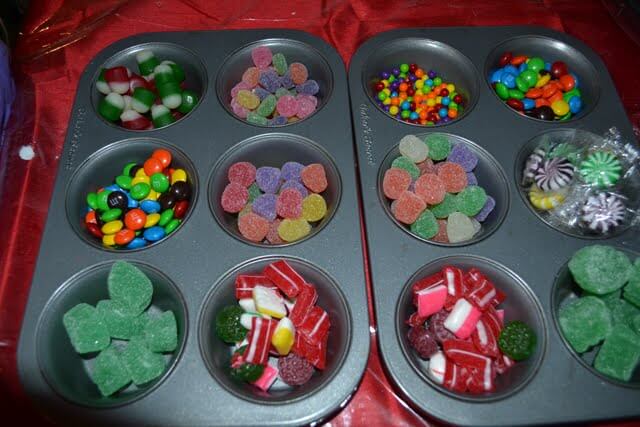
I made 2 muffin tins to share between the 3 girls, I manned the royal icing bag.
Christmas dots, M&Ms, spearmint trees, traditional hard candy mix, fruit swirls, spice drops all bought by me. The kit included a few gummy trees, a few flat gumdrops, and the little colourful round candies.
I didn't get any action shots. I took a few on my phone which turned out terrible. It really was a pretty busy event and stopping to snap photos was not going to happen. Perhaps next time, now that I have one gingerbread house under my belt!
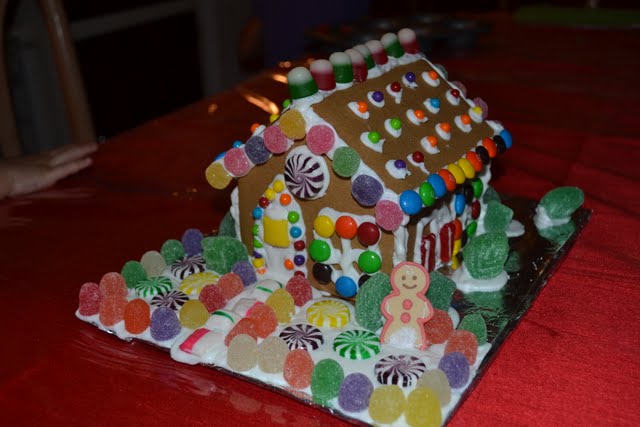
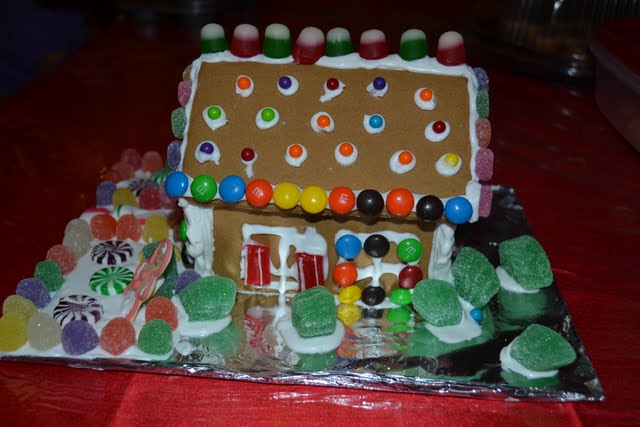
Here's our finished house:

Rose didn't want to stop decorating once we finished the house and walkway, so we added an entire front yard that she decorated. Can you see the little orange doorknob? Amy's idea - because how does the gingerbread man open the door!?!
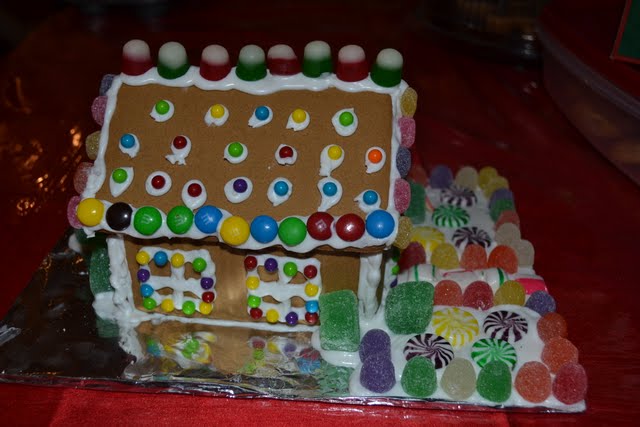
The better side!
Rose was very proud of her Christmas Dots pattern on the roof.
The failed attempt at window curtains side - LOL!
There must have been a wicked storm 'cuz those trees are leaning :)
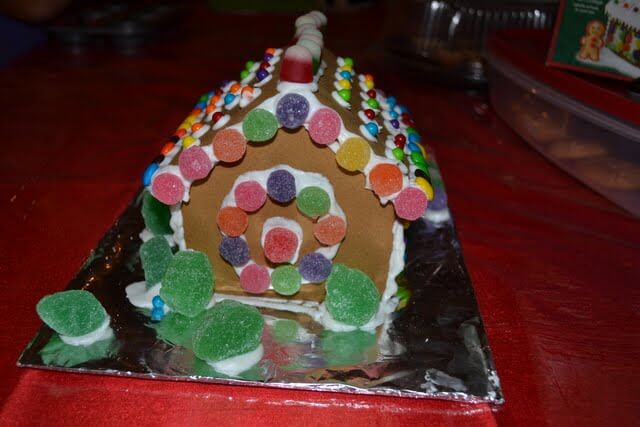
The back spice drop design
All in all I think I thinned the Royal icing too much. I knew that I was planning on doing the assembly one day and the decorating the next so I thought that *slightly* thinner icing would be better as I expected it to stiffen up a bit after being left in the bag overnight. Well it didn't really, so next time I won't do that. It wasn't a major problem I just had to get the kids to hold the items on for a bit before letting go. I think they did a great job overall.
This activity was SO FUN! I feel so silly for being afraid. The girls had a blast and we will make one every year from now on I'm certain. The kit made it really easy too. The pieces were precut, a base was included, all you have to do is add water to the icing mix and put it in the enclosed bag then assemble and decorate. Could. Not. Be. Easier.
Thanks MOM for *encouraging* me into a fun activity!
No comments:
Post a Comment
Thank you for your comments!
Please note that due to an increase in SPAM comments I have had to disable Anonymous comments.